4.3 Record Down Payment vs. PO
| Record Down Payment vs. PO | |
| Performer: | Finance |
| Role: | Finance Officer |
| Transaction : | WingsII – F-48 |
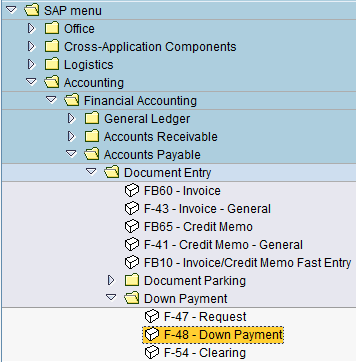
To create a Downpayment us the following path:
Accounting > Financial Accounting > Accounts Payable> Document Entry > Down Payment > Down Payment
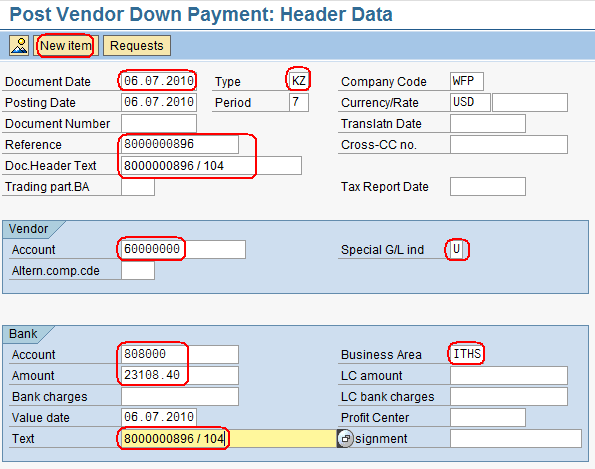
Fill all the mandatory fields of the initial screen with the following information:
- Document Date: today’s date
- Type of Document: make sure it is set to ‘KZ’
- Reference: use the following format to insert the ZINT PO Number (x) received from the CO followed: 8xxxxxxxxx
- Doc. Header Text: use the following format to insert the ZINT PO Number (x) received from the CO followed by the Sales Order Number (y): 8xxxxxxxxx / yyy
- Vendor Account: always the UNHRD Vendor Account 60000000
- Special G/L ind.: Select ‘U’ which stands for ‘Intra-company Vendor Advance’
- Business Area: ITHS
- Account: 808000
- Amount: total amount of the Pro Forma Invoice regarding ODOC (do not include MCR in this amount, a separate line for this will be created at the end).
- Text: same as Doc. Header Text
- Then press the ‘New Item’ button.
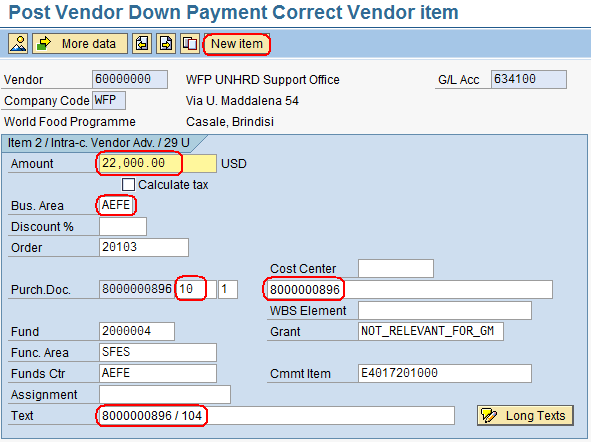
For each line item of the Purchase Order, fill in the following fields:
- Amount: First line value of the ZINT PO
- Bus. Area: take from the Account Assignment sheet in the PO Line item
- Purch. Doc. The first white box on the left should contain the line item of the PO (10 for first line item, etc.), and the most right white box should be filled with the PO Number
- Text: the same information as contained in the Doc. Header Text from the Header Screen
- Press Enter and all other necessary fields will be automatically derived from the information entered above
- Click ‘New Item’
- Do the above for each line item of the PO:
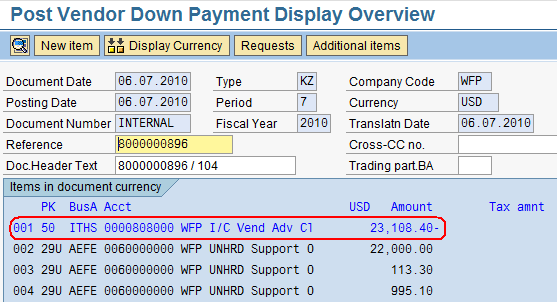
- Once the last PO line item (including the MCR) was inserted, press the ‘Overview’ button
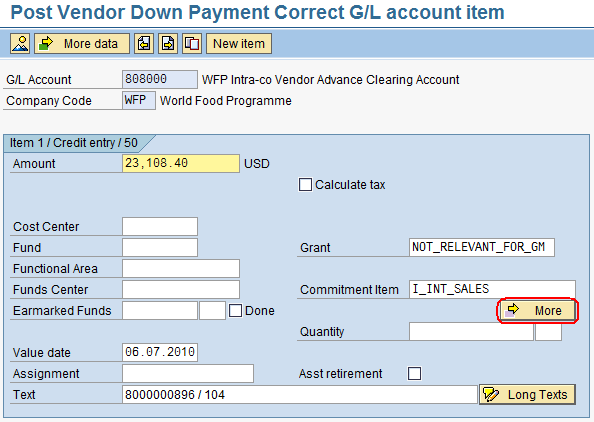
 to get back to the main screen. Here, double click on the first line item (808000):
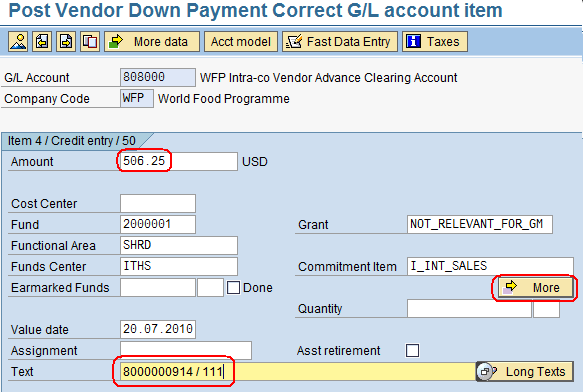
- Click on ‘More’:
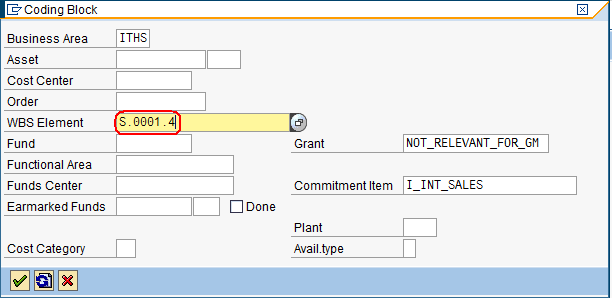
- Insert the WBS related to the UNHRD Top level Operations Specific Service Code: S.0001.4
- Click ‘Enter’
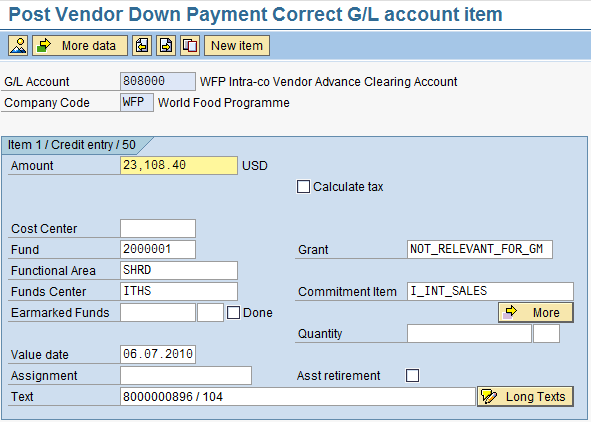
The System will automatically derive the related Fund codes:
Now, the MCR related line on the Vendor Advance Clearing Account can be added.
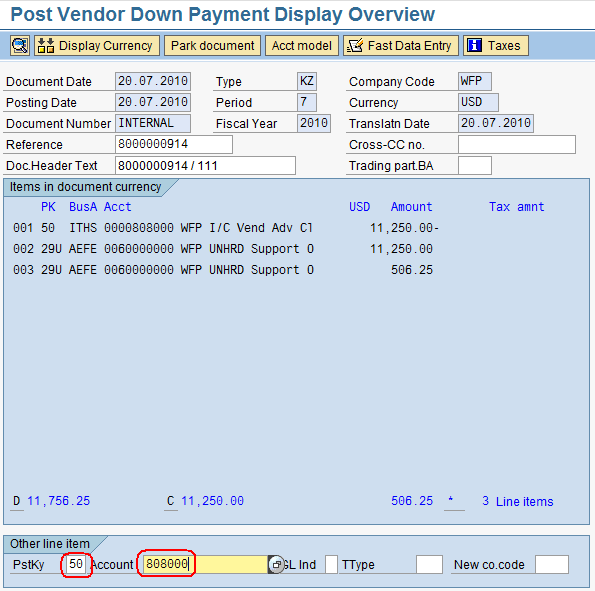
- Click on ‘Additional items’:
On the bottom of the document a new fast entry line will appear. Here, put in the following information:
- PstKy: ‘50’
- Account: ‘80800’
- Press ‘Enter’
- In the following screen enter the MCR Amount, fill the Text field with the standard text used above (PO / SO) and then click on ‘More’:
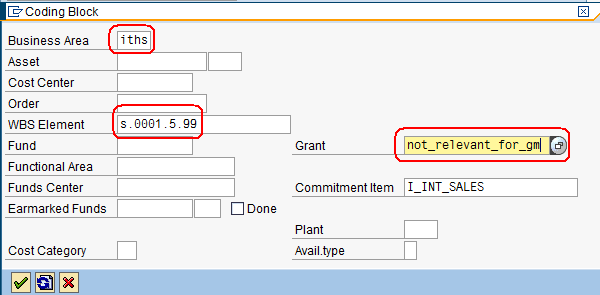
In the details screen then fill in the following information:
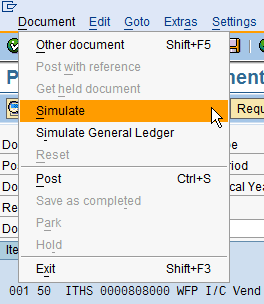
In case there are also Specific Services (WBS S.0001.5.98), add another line for these just as with the MCR. Then Go back to the Overview and follow the path: Document > Simulate
