5.9 Confirm Transfer Order: Difference between revisions
No edit summary |
No edit summary |
||
| Line 31: | Line 31: | ||
[[File:5.9_5.png]] | [[File:5.9_5.png]] | ||
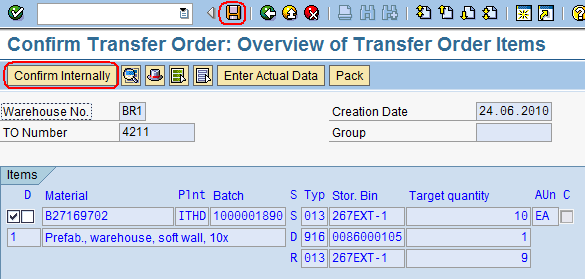
In the ‘Overview of Transfer Order Items’ screen press the ‘Confirm Internally’ button and then ‘Save’: | In the ‘Overview of Transfer Order Items’ screen select all the line items, press the ‘Confirm Internally’ button and then ‘Save’: | ||
[[File:5.9_6.png]] | [[File:5.9_6.png]] | ||
The system promps with a message notifying that the Transfer Order was confirmed: | |||
[[File:5.9_7.png]] | [[File:5.9_7.png]] | ||
Revision as of 20:34, 5 February 2014
| Confirm Transfer Order | |
| Performer: | Logistics |
| Role: | Logistics Assistant |
| Transaction : | WingsII – VL02N & LT12 |
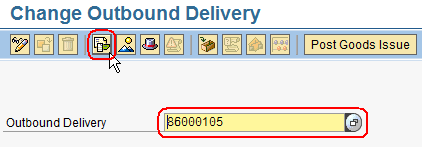
First, the Transfer Order number needs to be derived from the Outbound Delivery document. Run transaction VL02N, enter the Outbound Delivery document number and press the ‘Document Flow’ button:
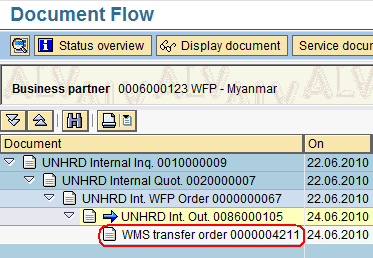
The Transfer Order Number can be found in the WMS transfer order line:
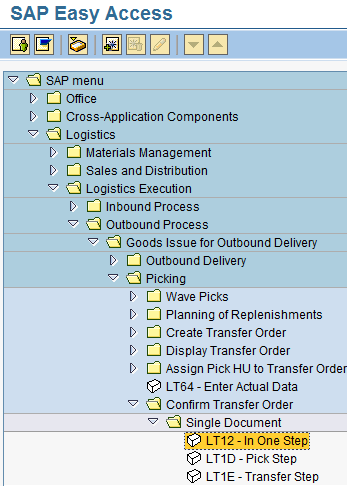
Note the Transfer Order number. Then, In order to confirm the Transfer Order, use the following path: Logistics > Logistics Execution > Picking > Confirm Transfer Order > Single Document > In One Step
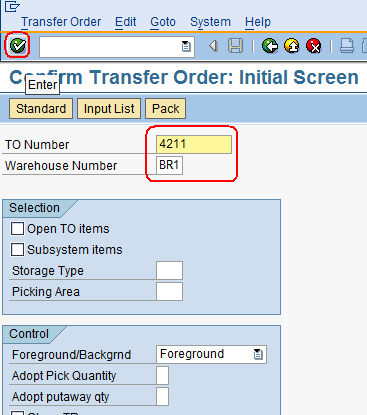
In the Initial Screen, enter the Transfer Order number derived from above, the Warehouse Number (i.e. ‘BR1’ for Brindisi), and then press ![]() :
:
In the ‘Overview of Transfer Order Items’ screen select all the line items, press the ‘Confirm Internally’ button and then ‘Save’:
The system promps with a message notifying that the Transfer Order was confirmed:
