10.3 NFI Receipt: Difference between revisions
Created page with "== Edit and Print Inspection Report == Go to transaction MB02 or follow the patch below: Logistics > Materials Management > Inventory Management > Material Document > MB02 ..." |
No edit summary |
||
| Line 1: | Line 1: | ||
== Post Good Receipt against PO for NFI and POWM == | |||
== Edit and Print Inspection Report == | == Edit and Print Inspection Report == | ||
Revision as of 08:09, 3 November 2015
Post Good Receipt against PO for NFI and POWM
Edit and Print Inspection Report
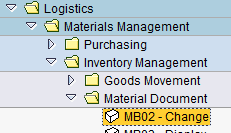
Go to transaction MB02 or follow the patch below:
Logistics > Materials Management > Inventory Management > Material Document > MB02 – Change
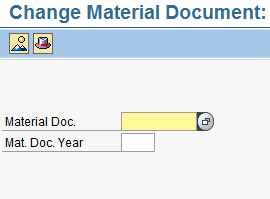
Enter the Material Document and hit ![]() :
:
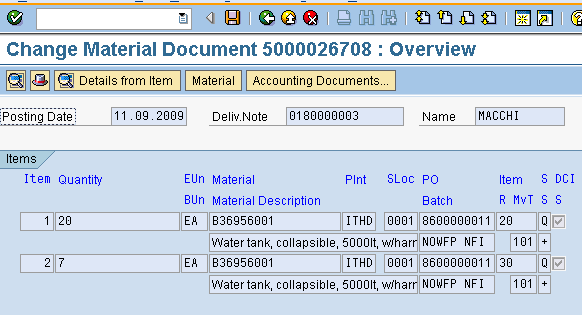
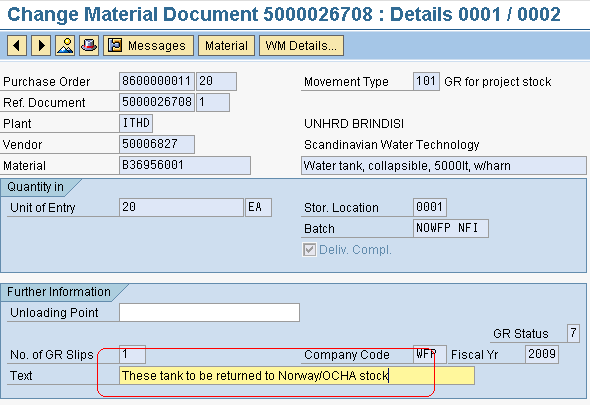
The system displays the details of the GR posted:
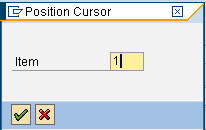
Click on ![]() and type in the line item number:
and type in the line item number:
In the Text field type any required remarks:
Click on ![]() Enter ZE01 as Output and EN as language:
Enter ZE01 as Output and EN as language:
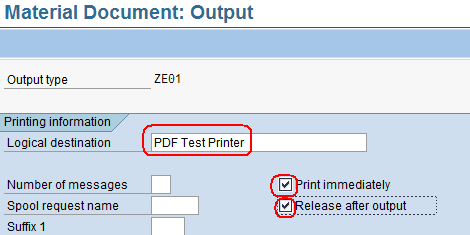
Click on ![]() and enter “PDF Test Printer” as logical destination and match the 2 options circled below and hit
and enter “PDF Test Printer” as logical destination and match the 2 options circled below and hit ![]() and on
and on ![]() to return to previos screen:
to return to previos screen:
Select the line Output created and click on ![]() :
:
Select “Send with application own transaction” as Requested processing:
Hit ![]() and on
and on ![]() to return to previous screen and click on
to return to previous screen and click on ![]() twice.
twice.
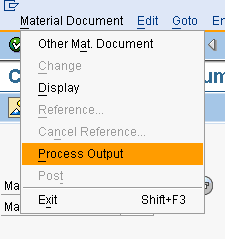
Click on “Material Document” and on Process Output:
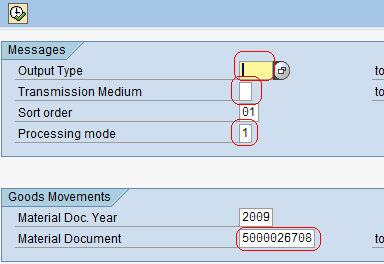
The system will prompt the Document number automatically; enter ZE01 in the Output Type field and 1 in the Processing Mode field and hit on ![]() :
:
NOTE In case it is requried to reprint or resave and Inspection Report already processed, entre 3 as Processing Mode.
Select the material document and hit on ![]() :
:
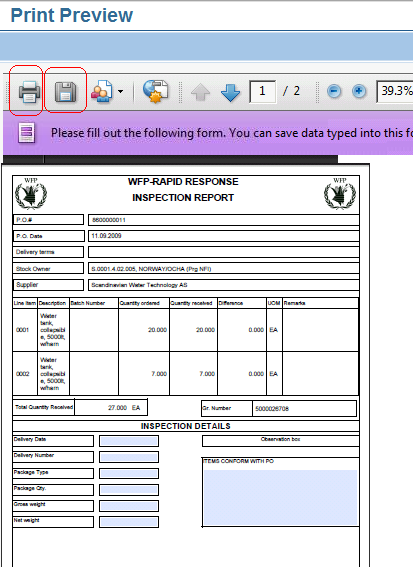
The system will return the Inspection Report form that can ebe ither saved on the computer as Adobe file or printed out on local printer after the required information have been entered:
Fill in the cells by entering the informtaion required to complete the printout in the editable fields (in gray) such as the delivery date, the packaging details, the weight of cargo received, observation on the materials, if any, name of who inspected the materials and date of inspection.
Hit on ![]() to save the report and select the preferred location on local computer:
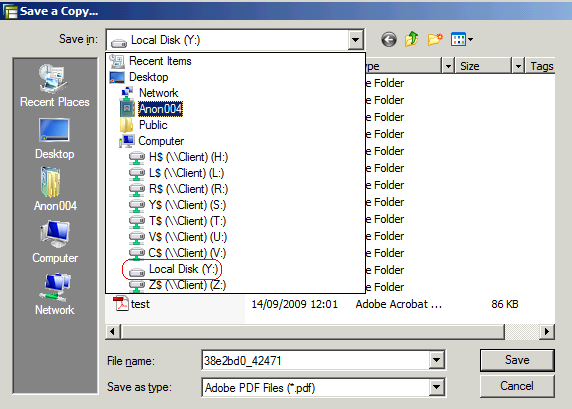
to save the report and select the preferred location on local computer:
Browse for the desired location, change file name if required and hit on ![]()
NOTE The C: drive of your computer is listed as 'Local Disk Y:'. Don't save the Inspections Reports on the 'Desktop' ad the one shown it is related to Citrix Server, not the desktop on user's computer.
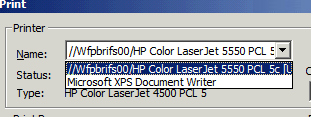
To print the Inspection Report click on ![]() . The system shows the default printer set on the local computer; anyother printer installed on it can be selected from the drop-down menu:
. The system shows the default printer set on the local computer; anyother printer installed on it can be selected from the drop-down menu:
Select a local printer and hit on OK.
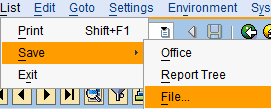
To save the Inspection Report click on List on the menu bar on the top, then on Save and File:
Select the preferred format (“Spreadsheet” is recommended) and hit ![]() .
Select the directory from the browse icon and chen click on Desktop and on Computer to save the INspection Report on the preferred locaiton on the server or local disk.
.
Select the directory from the browse icon and chen click on Desktop and on Computer to save the INspection Report on the preferred locaiton on the server or local disk.
