5.13 Print the Final Packing List: Difference between revisions
Jump to navigation
Jump to search
No edit summary |
No edit summary |
||
| (2 intermediate revisions by the same user not shown) | |||
| Line 1: | Line 1: | ||
{| align="right" border="1" class="wikitable" | {| align="right" border="1" class="wikitable" | ||
|- | |- | ||
| colspan="2" align="center" | ''' | | colspan="2" align="center" | '''Print the Final Packing List'''<br/> | ||
|- | |- | ||
| '''Performer:''' | | '''Performer:''' | ||
| Line 23: | Line 23: | ||
::[[File:5.13_3.png]] | ::[[File:5.13_3.png]] | ||
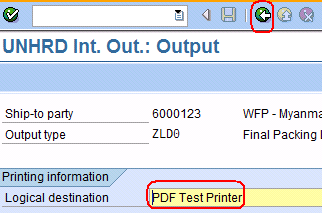
:*In the following screen, specify the printer by choosing ‘PDF TestPrinter’ as the Logical destination and | |||
:*In the following screen, specify the printer by choosing ‘PDF TestPrinter’ as the Logical destination and click on [[File:Backarrow.png]]to get back to the main Output screen: | |||
::[[File:5.13_4.png]] | ::[[File:5.13_4.png]] | ||
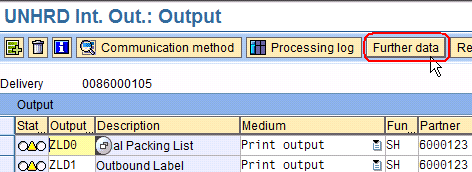
:*Here, click on ‘Further Data’: | :*Here, click on ‘Further Data’: | ||
| Line 31: | Line 33: | ||
::[[File:5.13_5.png]] | ::[[File:5.13_5.png]] | ||
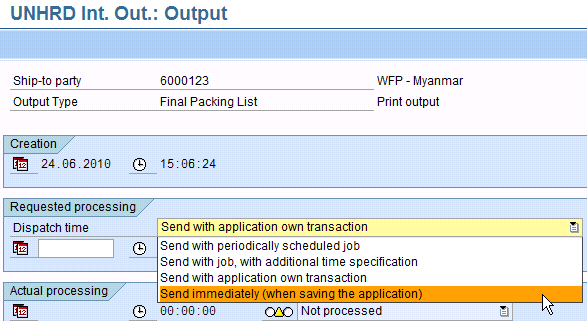
:*In the next screen, choose ‘Send immediately’ from the drop-down menu for the Dispatch time and click | |||
:*In the next screen, choose ‘Send immediately’ from the drop-down menu for the Dispatch time and click on [[File:Backarrow.png]] to get back to the overview: | |||
::[[File:5.13_6.png]] | ::[[File:5.13_6.png]] | ||
:*Click on [[File:5.13_7.png]] to save the Outbound Delivery and start printing | :*Click on [[File:5.13_7.png]] to save the Outbound Delivery and start printing | ||
Latest revision as of 07:28, 13 February 2014
| Print the Final Packing List | |
| Performer: | Logistics |
| Role: | Logistics Assistant |
| Transaction : | WingsII – VL02N |
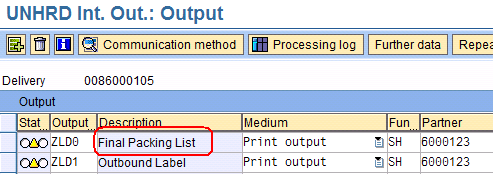
To print out the Final Packing List use the following path: Extras > Delivery Output > Header
- Here, click on ‘Further Data’:


